Save your family during emergencies by creating a life-saving water filter from household items in under 30 minutes. This DIY solution uses bottles, charcoal, sand, and cloth—but remember, always sterilize after filtering to make water truly safe for drinking.
Water is your most urgent survival need in any emergency situation. While you might survive weeks without food, you'll last only about three days without clean water. This stark reality makes knowing how to filter and purify water one of the most critical survival skills you can possess.
Natural water sources like streams, ponds, and even rainwater contain invisible threats – harmful bacteria, parasites, and contaminants that can cause severe illness when you're already in a vulnerable situation. Learning to transform potentially dangerous water into safe drinking water using everyday materials could quite literally save your life.
The authors of The Ultimate Prepper's Survival Handbook believe that everyone should master basic survival filtration techniques before they're needed in a crisis. Let's look at how to build an effective emergency water filter using materials you likely already have around your home.
Building an effective water filter requires gathering several common materials, each serving a specific purpose in the filtration process. Here's what you'll need:
A clean plastic bottle forms the foundation of your filter. Cut off the bottom to create a funnel shape, keeping the cap area intact but with a small hole for water to flow through. If you don't have a plastic bottle, any cone-shaped container can work.
This will serve as both your initial and final filtration layer. Cotton fabric, bandanas, coffee filters, or even a clean sock can work effectively to strain larger particles.
The purification powerhouse of your filter. Charcoal from a campfire (not briquettes with chemicals) can be crushed into small pieces. This layer absorbs toxins, improves taste, and removes many harmful chemicals.
You'll need both fine sand and coarser sand. These layers trap smaller particles and microorganisms. River sand works well, but avoid colored or treated sands from hardware stores.
The top layer consists of small rocks or gravel that prevent the water you pour from disturbing the finer filtering materials beneath.
You'll need a clean container to catch the filtered water. This could be anything from a pot to a water bottle or cup.
Creating an effective water filter isn't just about piling materials together—it's about understanding how each layer addresses different contaminants. Your DIY filter mimics professional multi-stage filtration systems, with each component playing a crucial role.
The cloth or coffee filter layer acts as your first line of defense, catching large debris like leaves, insects, and visible sediment. Without this initial screening, larger particles would quickly clog your filter's finer components.
The charcoal layer is perhaps the most powerful element. Made from burned wood (ideally hardwood), it contains millions of microscopic pores that trap chemicals, pesticides, and many dissolved impurities. These pores create an enormous surface area where adsorption occurs—a process where contaminants physically bind to the charcoal surface. This is why activated charcoal is used in professional water filters and even in medical settings to treat poisonings.
Sand layers work through mechanical filtration. The varying granule sizes create a maze-like path that traps differently sized particles. Fine sand catches smaller particles that made it through the coarser sand. These layers also support beneficial bacteria growth that can break down some biological contaminants if the filter is used regularly.
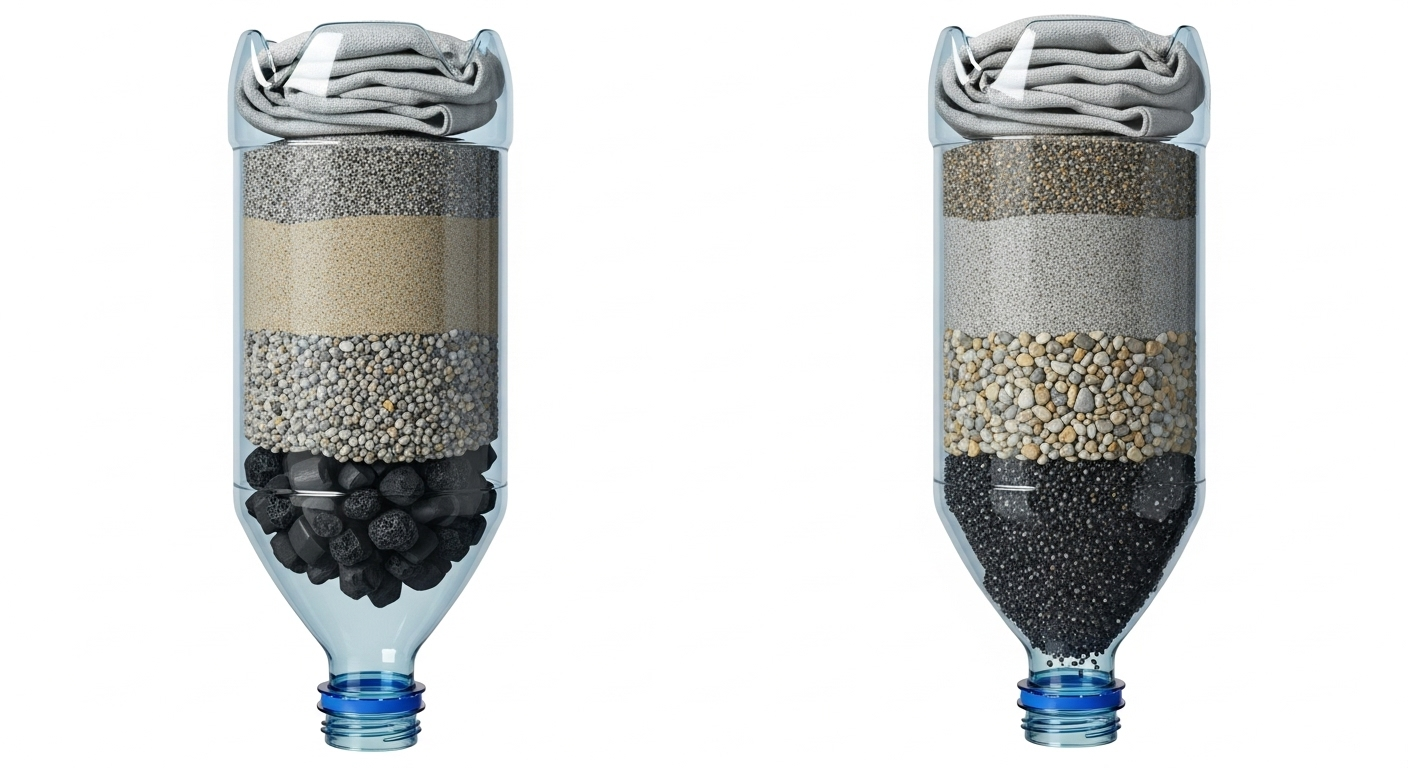
The success of your emergency filter depends on the strategic layering of materials. Each layer builds upon the previous one's work, addressing progressively smaller contaminants.
Water naturally wants to take the path of least resistance. By forcing it through multiple materials of decreasing pore size, you ensure it doesn't simply channel through one easy pathway. This maximizes contact time with purifying materials like charcoal.
The order matters significantly—placing materials in the wrong sequence dramatically reduces effectiveness. Always build from coarsest materials at the top (where water enters) to finest at the bottom, mimicking nature's own filtration process through soil layers.
While your DIY filter can dramatically improve water quality, understanding its limitations is crucial for safety. These homemade systems cannot:
This is why the sterilization step after filtering is non-negotiable for survival situations.
Now let's put everything together into a working emergency water filter:
Take your plastic bottle and cut off the bottom to create a funnel. Keep the cap on and poke a small hole through it with a knife or scissors. This small opening controls flow rate—too large and water rushes through without proper filtering; too small and you'll be waiting forever.
If using a different container, ensure it has a narrow outlet and wider input area to create the necessary funnel shape.
Place your first piece of cloth or coffee filter over the bottle cap (from the inside) and secure it. This prevents filtering materials from escaping through the hole. Make sure it's tight against the opening but not compacted so water can still flow through.
Crush your charcoal into small pieces—about the size of grains of rice or smaller. Smaller pieces create more surface area for better purification. Add a 1-2 inch layer of charcoal directly on top of the bottom cloth layer.
Some survival experts recommend rinsing the charcoal first to remove ash, but in a true emergency, this step can be skipped if water is scarce.
Add a 2-3 inch layer of fine sand on top of the charcoal. Pack it down slightly but not so tight that water can't percolate through. Then add another 2-3 inch layer of coarser sand or small pebbles.
Add a final 1-2 inch layer of gravel or small rocks at the very top. This prevents the incoming water from disturbing your carefully arranged sand layers and creating channels that would reduce filtering effectiveness.
Place another piece of cloth on top of the gravel layer. This acts as a pre-filter to catch the largest debris and makes cleaning your filter much easier—you can simply remove and rinse this cloth rather than having to rebuild the entire filter when it clogs.
In survival situations, plastic bottles might not be available. Fortunately, nature provides several alternatives that can work nearly as well:
With any of these natural containers, the filtering principles remain the same—layer your materials from finest at the bottom to coarsest at the top, and ensure water flows through all layers.
This is perhaps the most important section of this guide: filtering water is only half the battle. Even crystal-clear filtered water can harbor invisible microorganisms that cause serious illness. Never skip these sterilization steps.
Boiling is the gold standard for water purification. It kills virtually all disease-causing organisms, including bacteria, viruses, and parasites. Here's how to do it right:
Boiling does use significant fuel resources and requires time to both heat and cool the water, so plan accordingly.
When fuel for boiling isn't available, solar disinfection (SODIS) can be effective, though it takes significantly longer:
This method is less effective in cold weather or with very cloudy water, so use it as a last resort when boiling isn't possible.
Chemical treatments offer another reliable backup option:
Chemical treatments are less effective against certain parasites like Cryptosporidium, so combine with filtration for best results.
Several plants have natural water-purifying properties that indigenous cultures have used for centuries:
While these natural methods can improve water quality, they should always be followed by proper sterilization.
Before attempting any complex filtration, let nature do some of the work through simple sedimentation:
This simple step significantly improves the effectiveness and longevity of your filter by removing larger particles that would quickly clog it.
Building an emergency water filter using common materials could save your life in a survival situation. Remember these key principles:
Clean water is your most immediate survival priority. With these techniques, you can transform questionable water sources into lifesaving hydration when conventional systems aren't available.
For deeper strategies on survival skills and emergency readiness, The Ultimate Prepper's Survival Handbook is a valuable source.